This Xano backend provides authentication (without the Firebase setup) and allows you to upload images and comments. The authentication works by having a login form that returns an auth-token that Bravo propagates to other requests.
We have to change the stock functionality to make it work with the image upload in Bravo.
A) Setup Xano
1.Signup with Xano
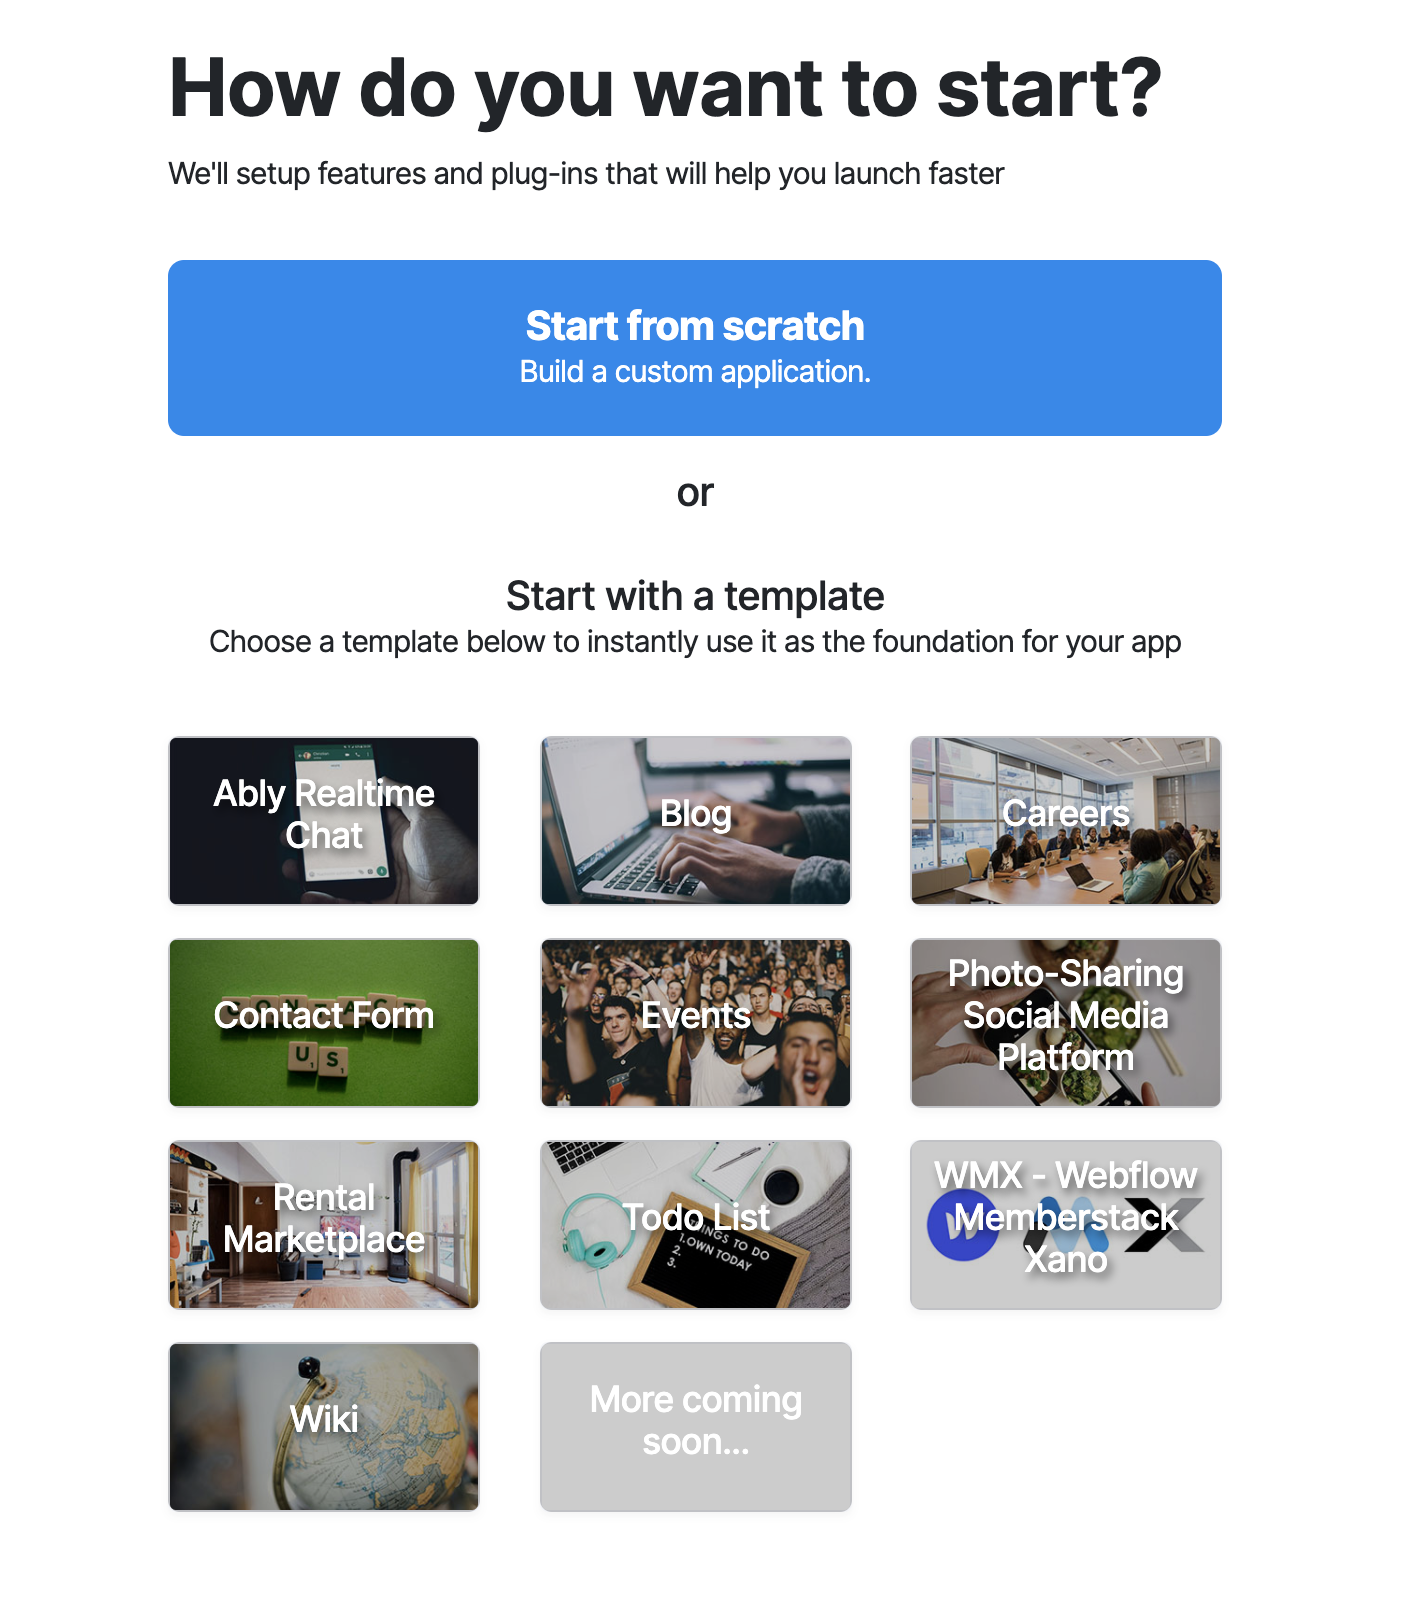
2.At how do you want to start — choose “Photo sharing social media platform”
B) Edit photo API to work with Bravo Image upload
1.Click on API on the left hand side
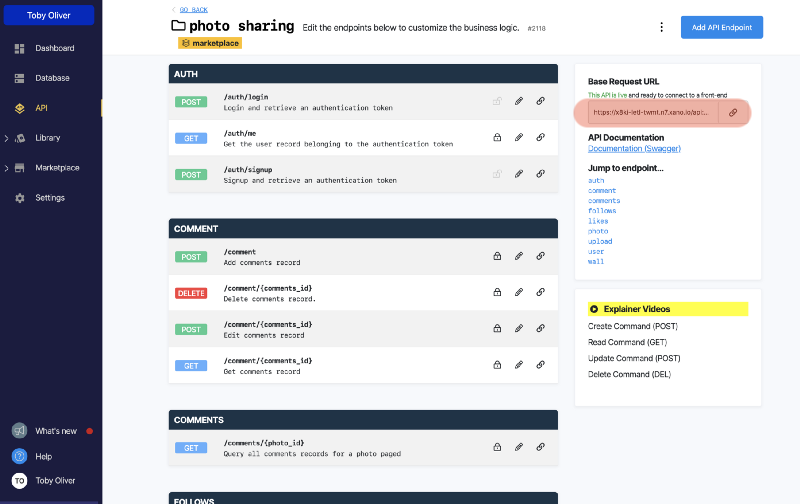
2.In photo sharing click on View 27 Endpoints to get this (record the Base Request URL highlighted in red below, you will need it later in the Bravo API Binding steps):
3.click on the /photo endpoint
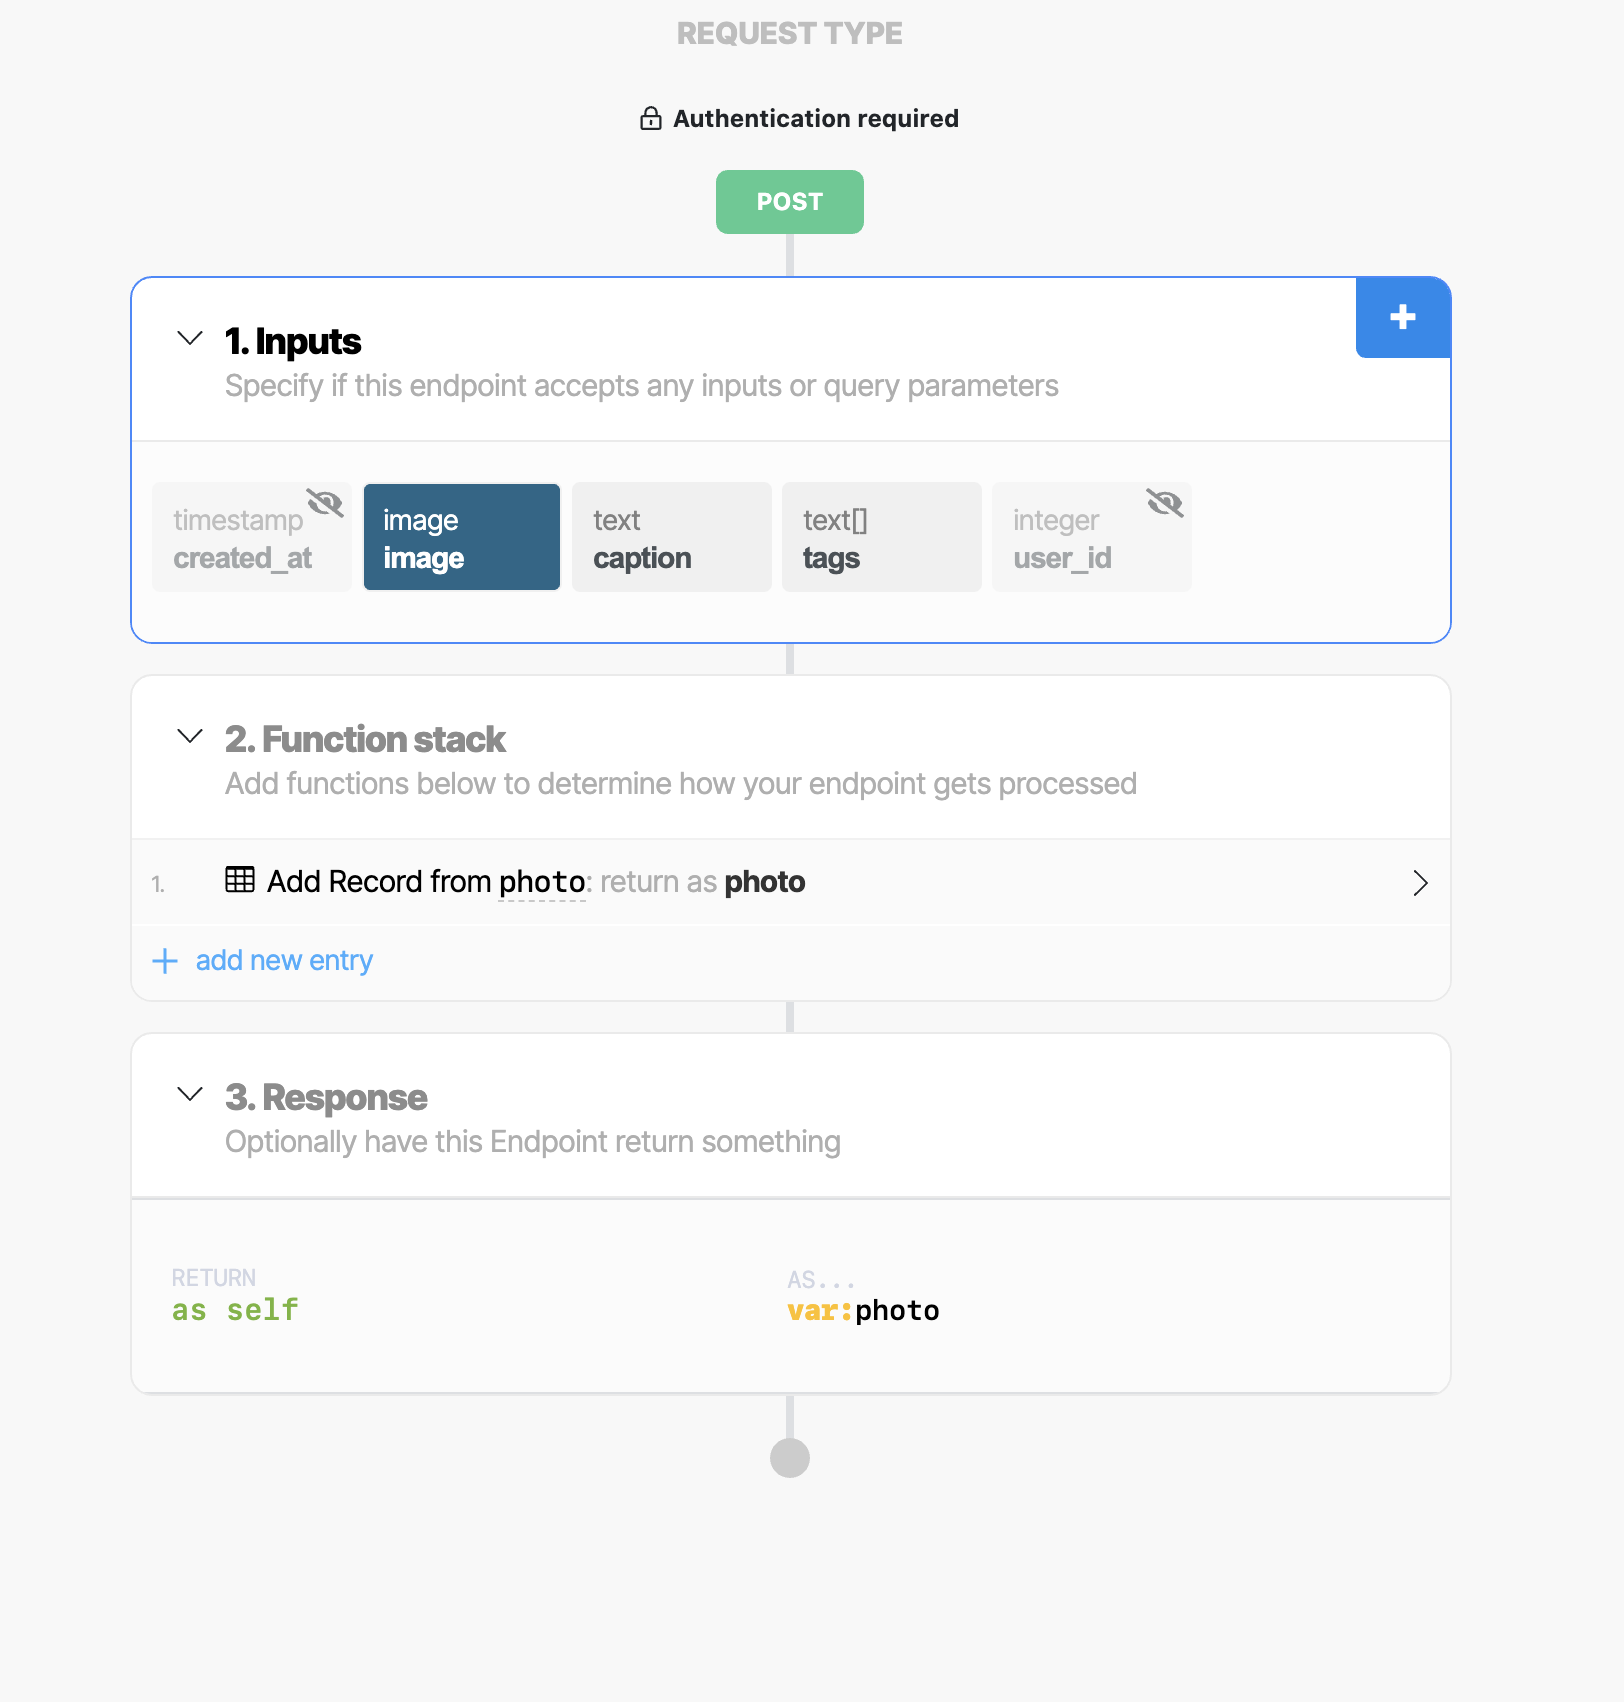
- In inputs click on image
In right sidebar click on the toggle to make it hidden from the API
Click on SAVE
5.Click on + next to inputs
- Click on Text to add text field
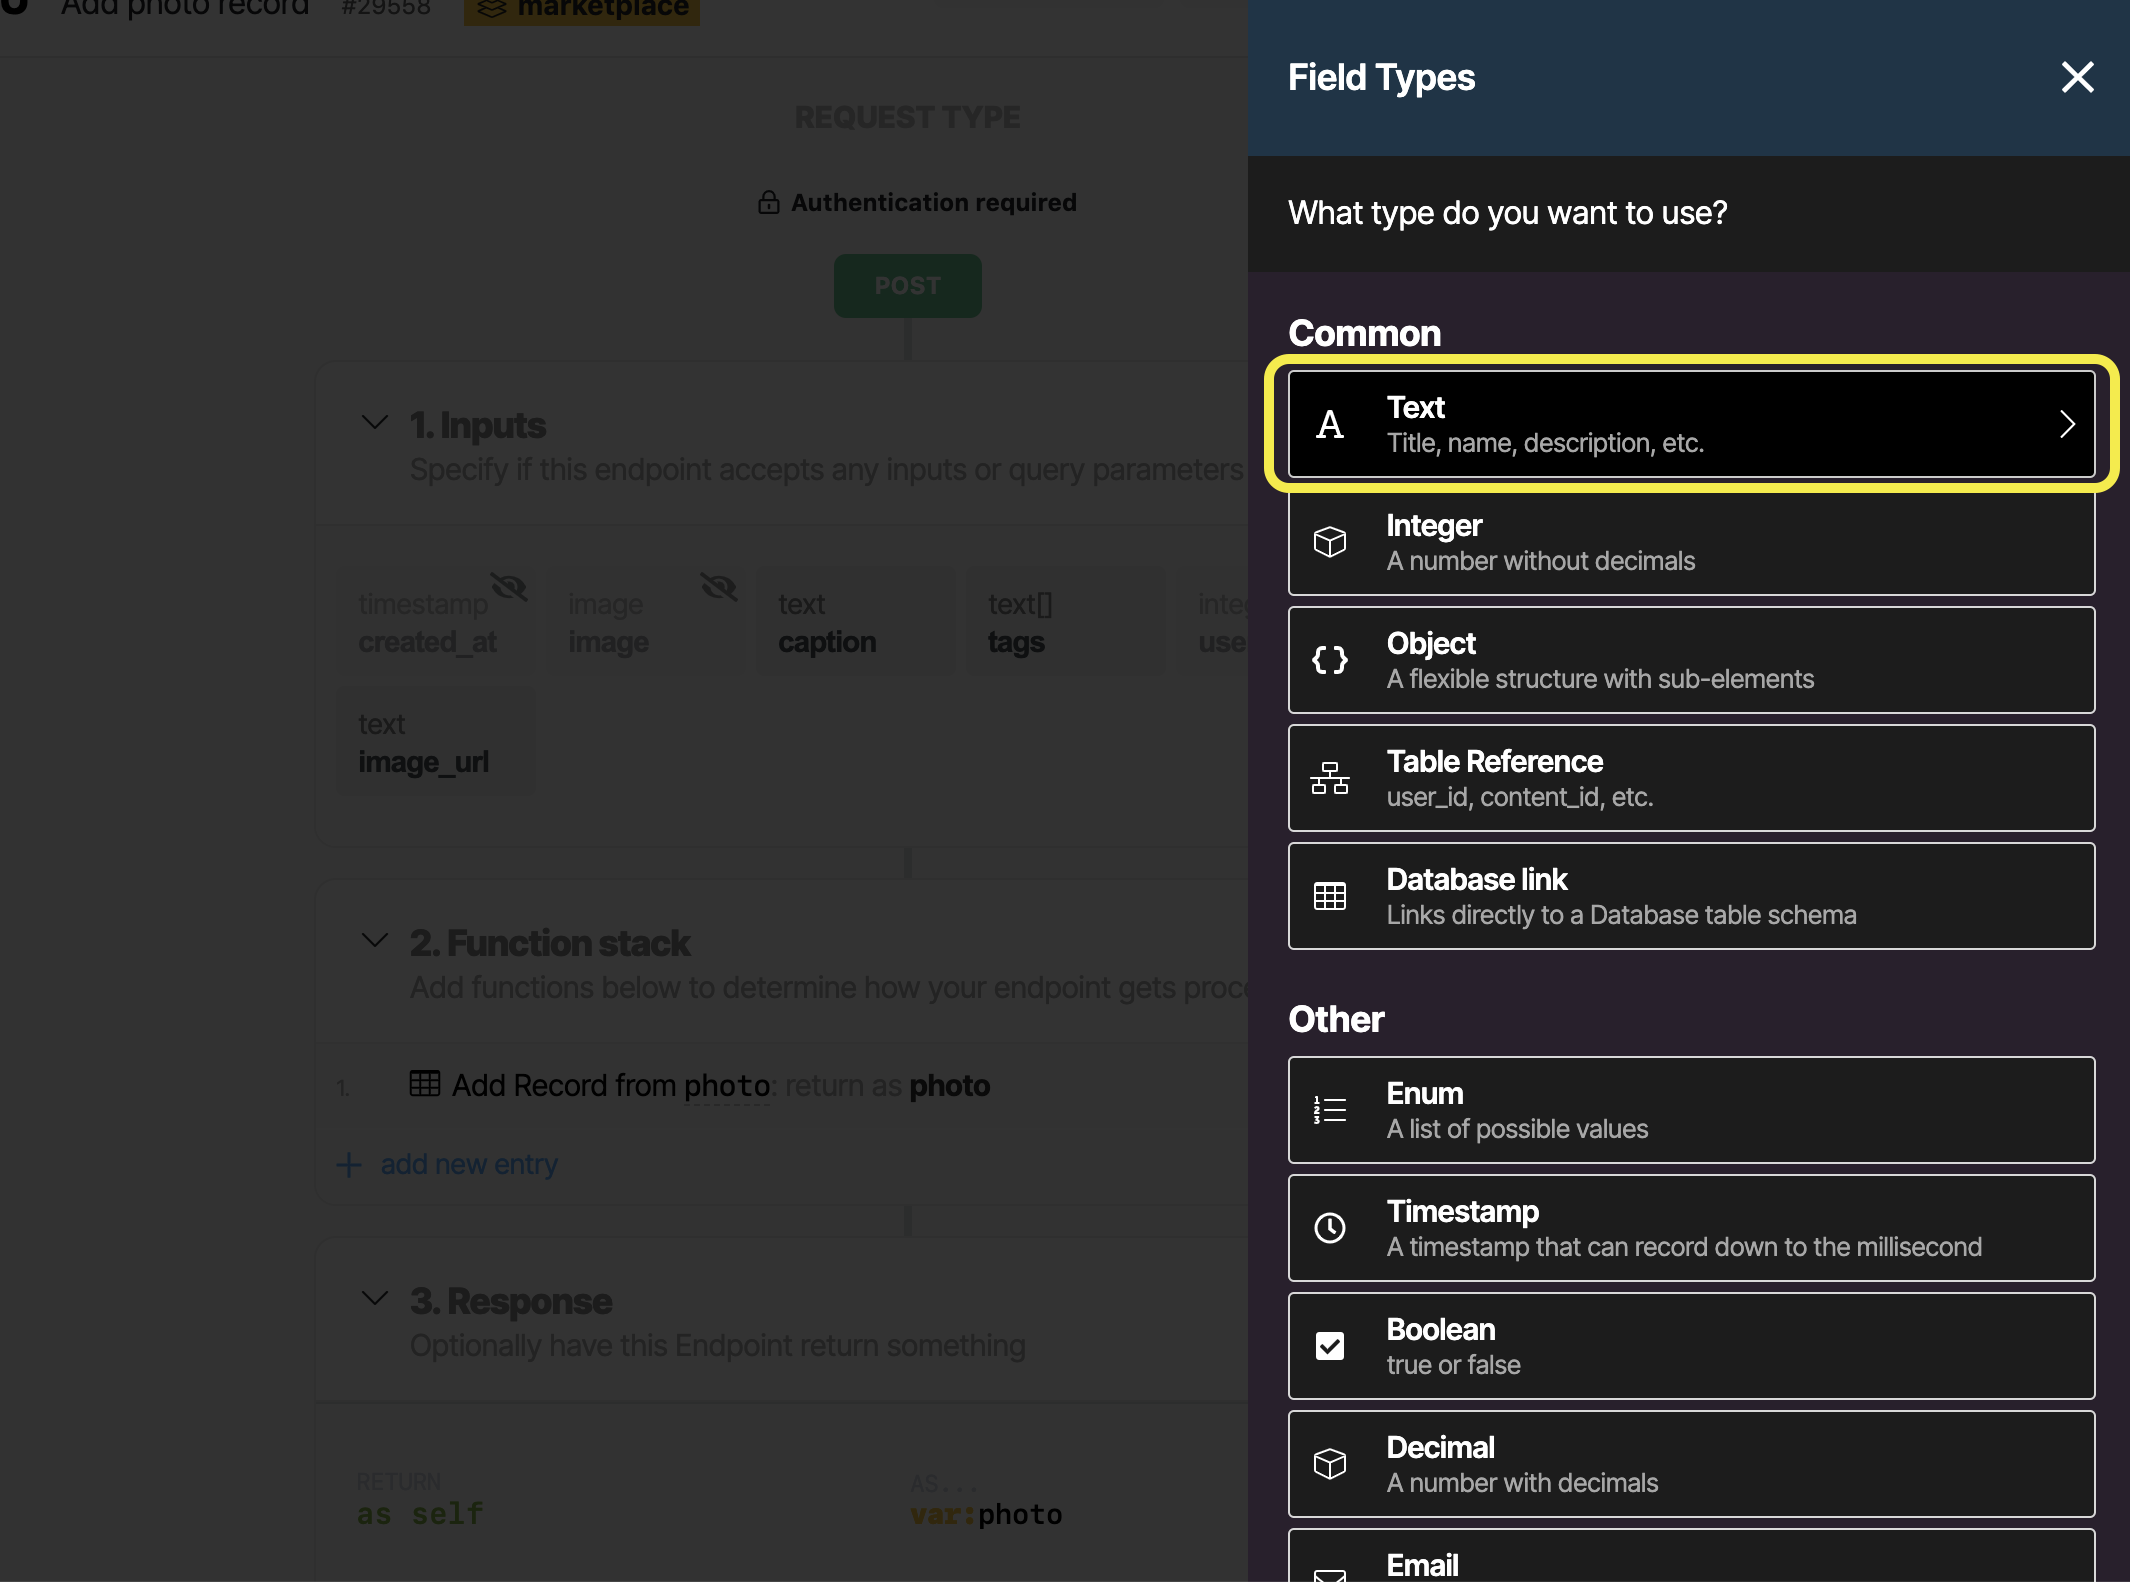
- Name the text field ‘image_url’
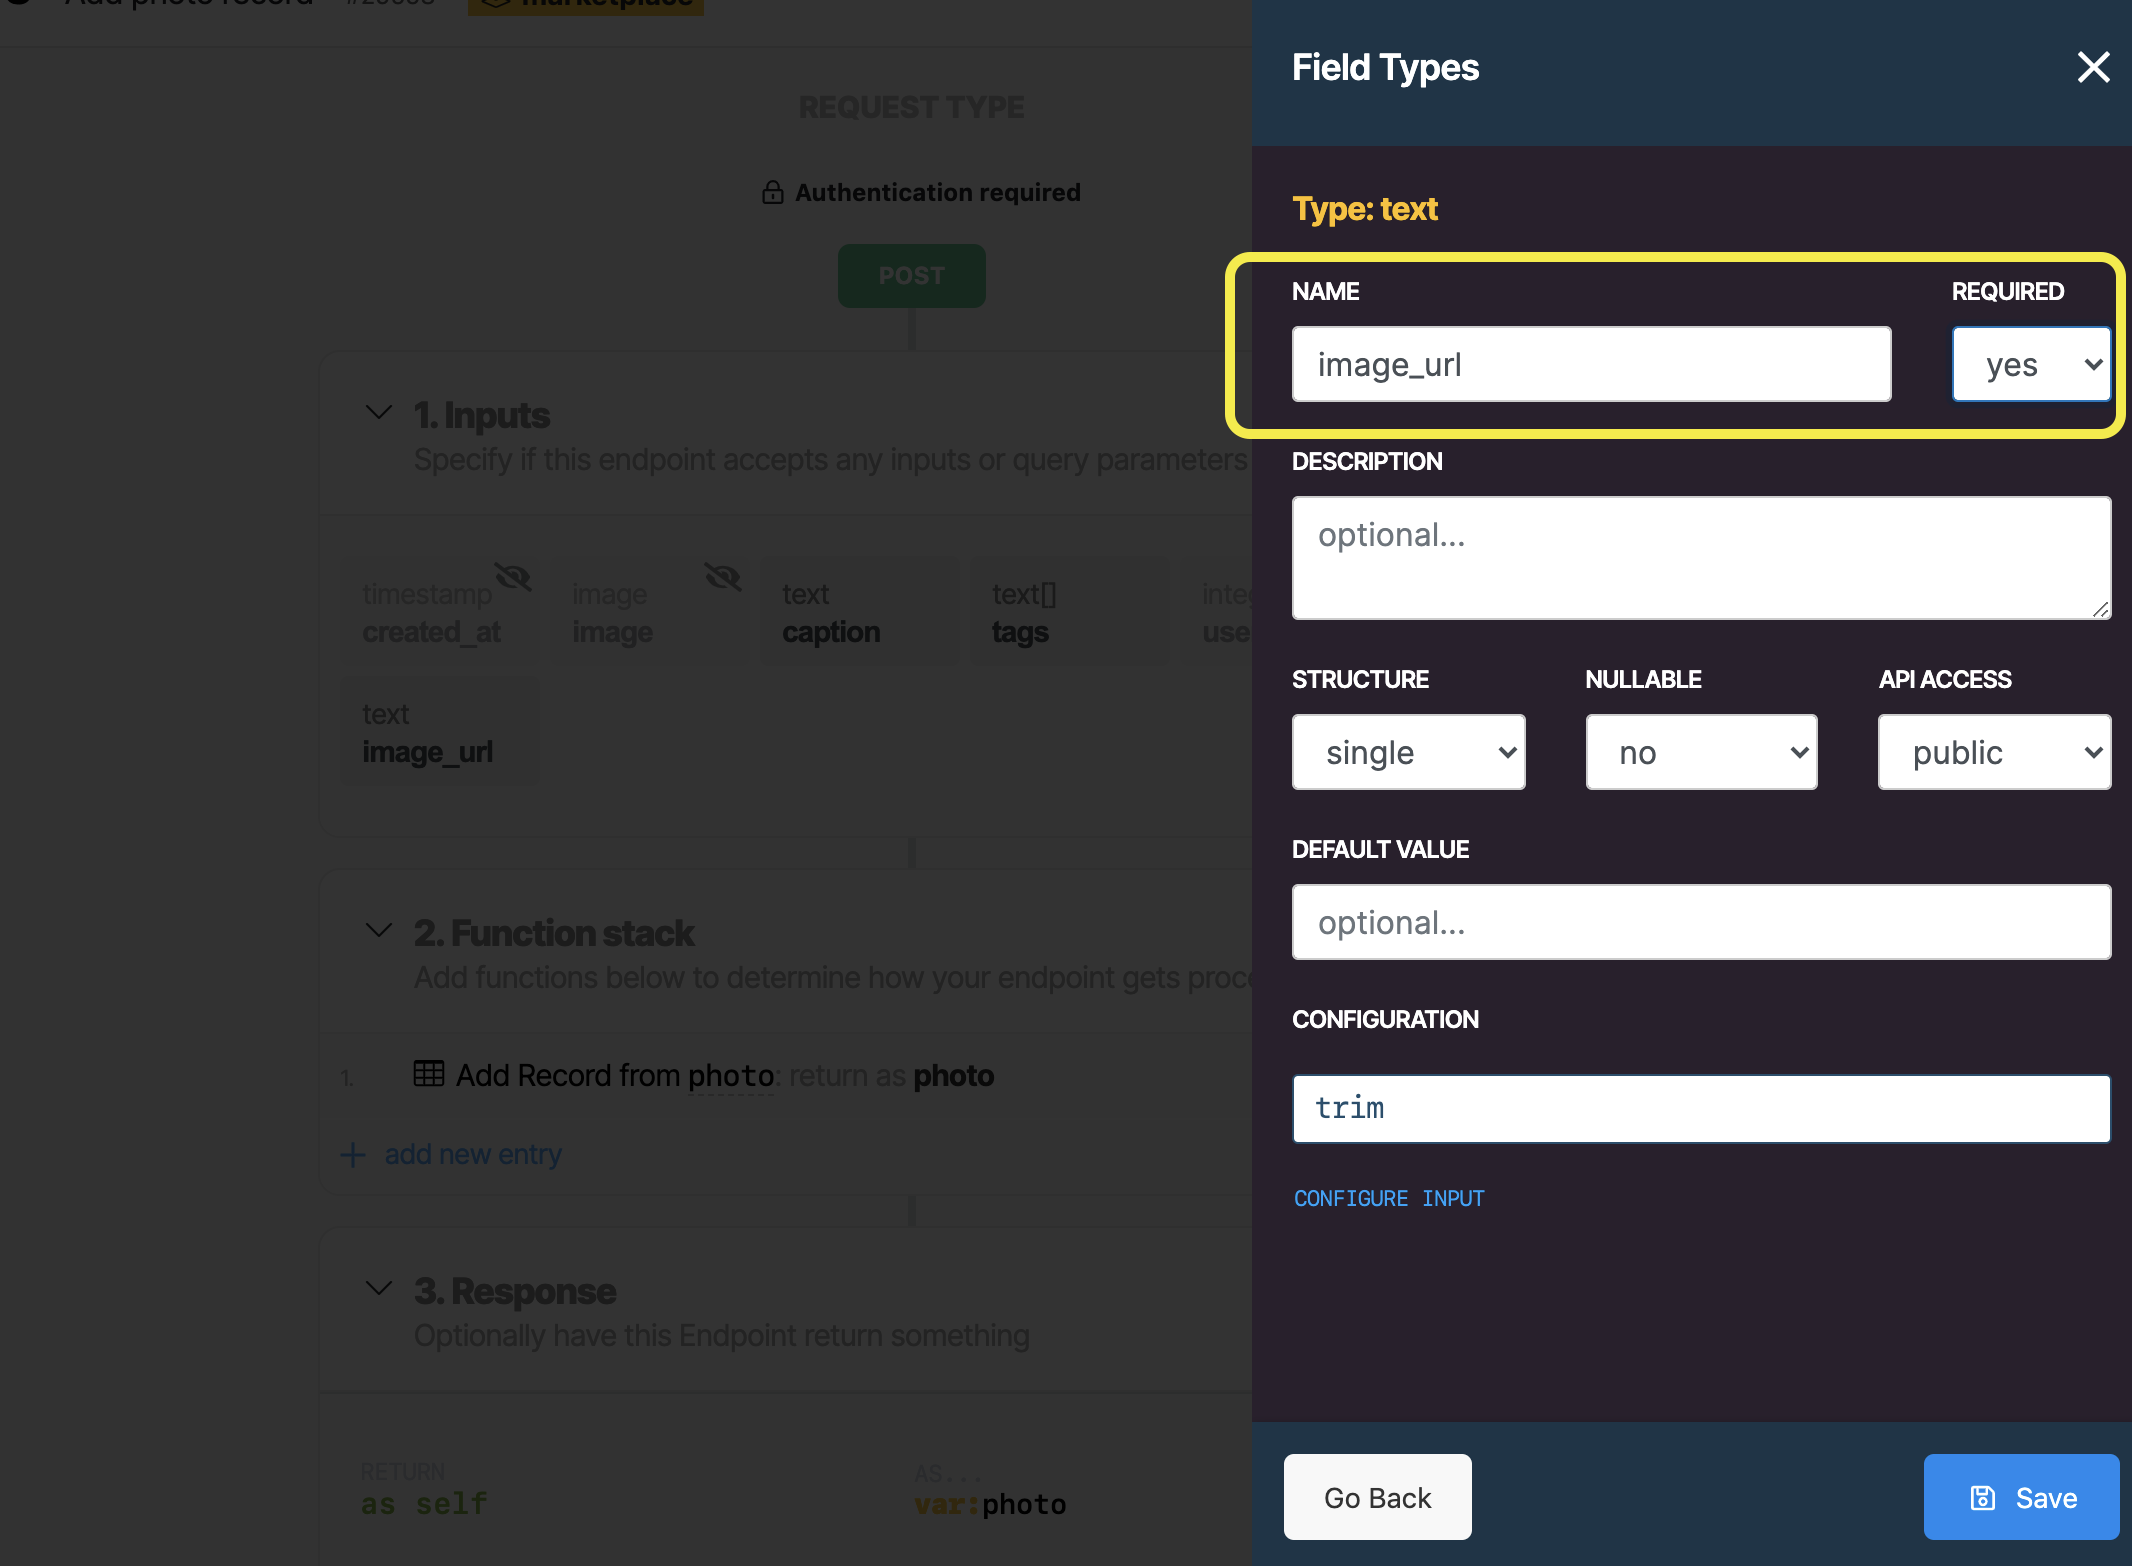
Set required to ‘Yes’
Click SAVE
6.Click on + next to function stack
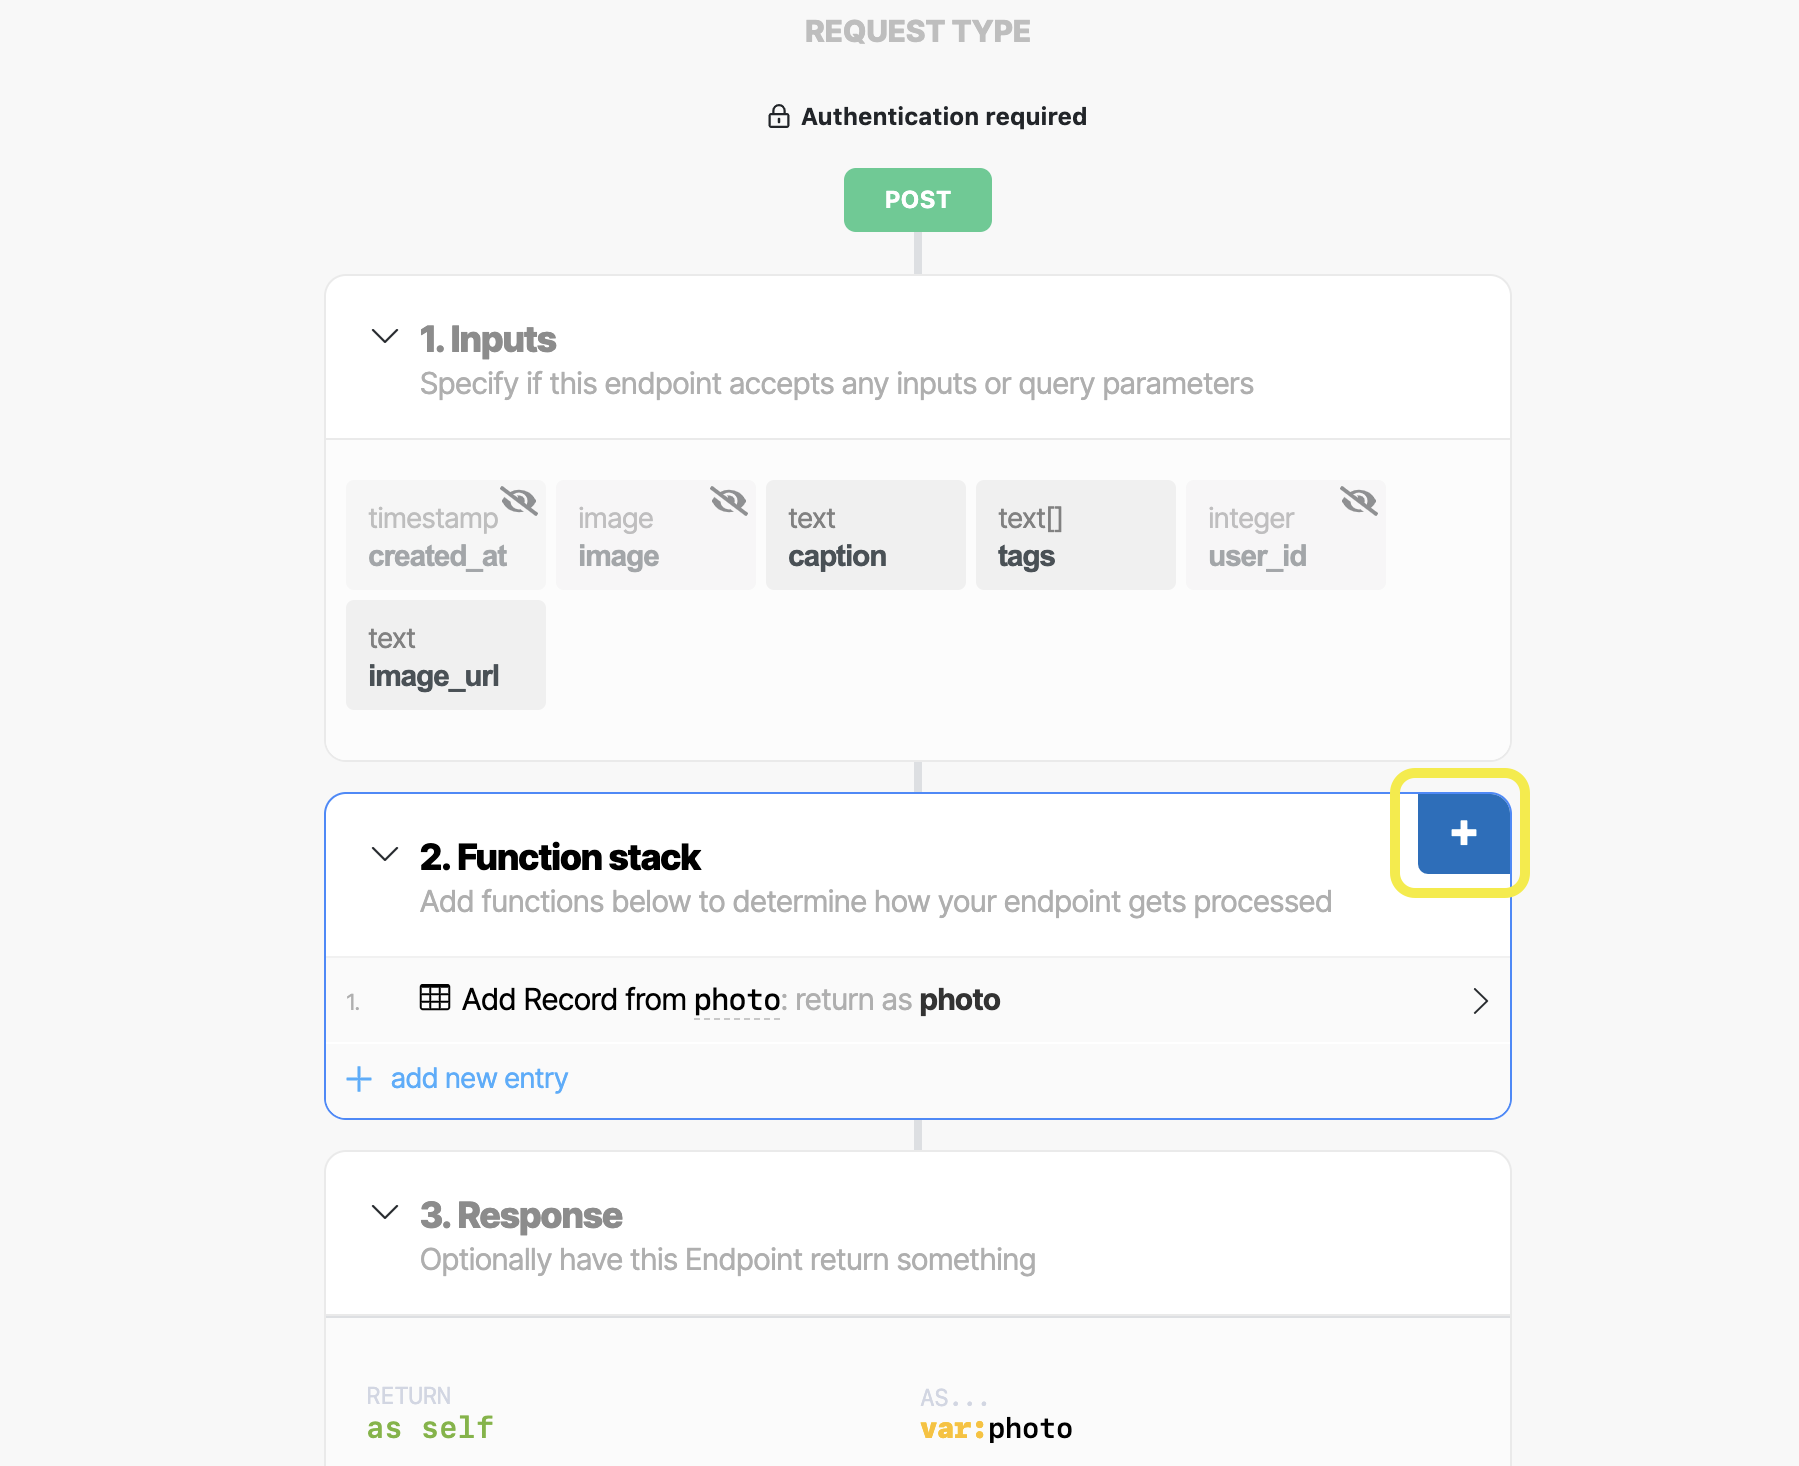
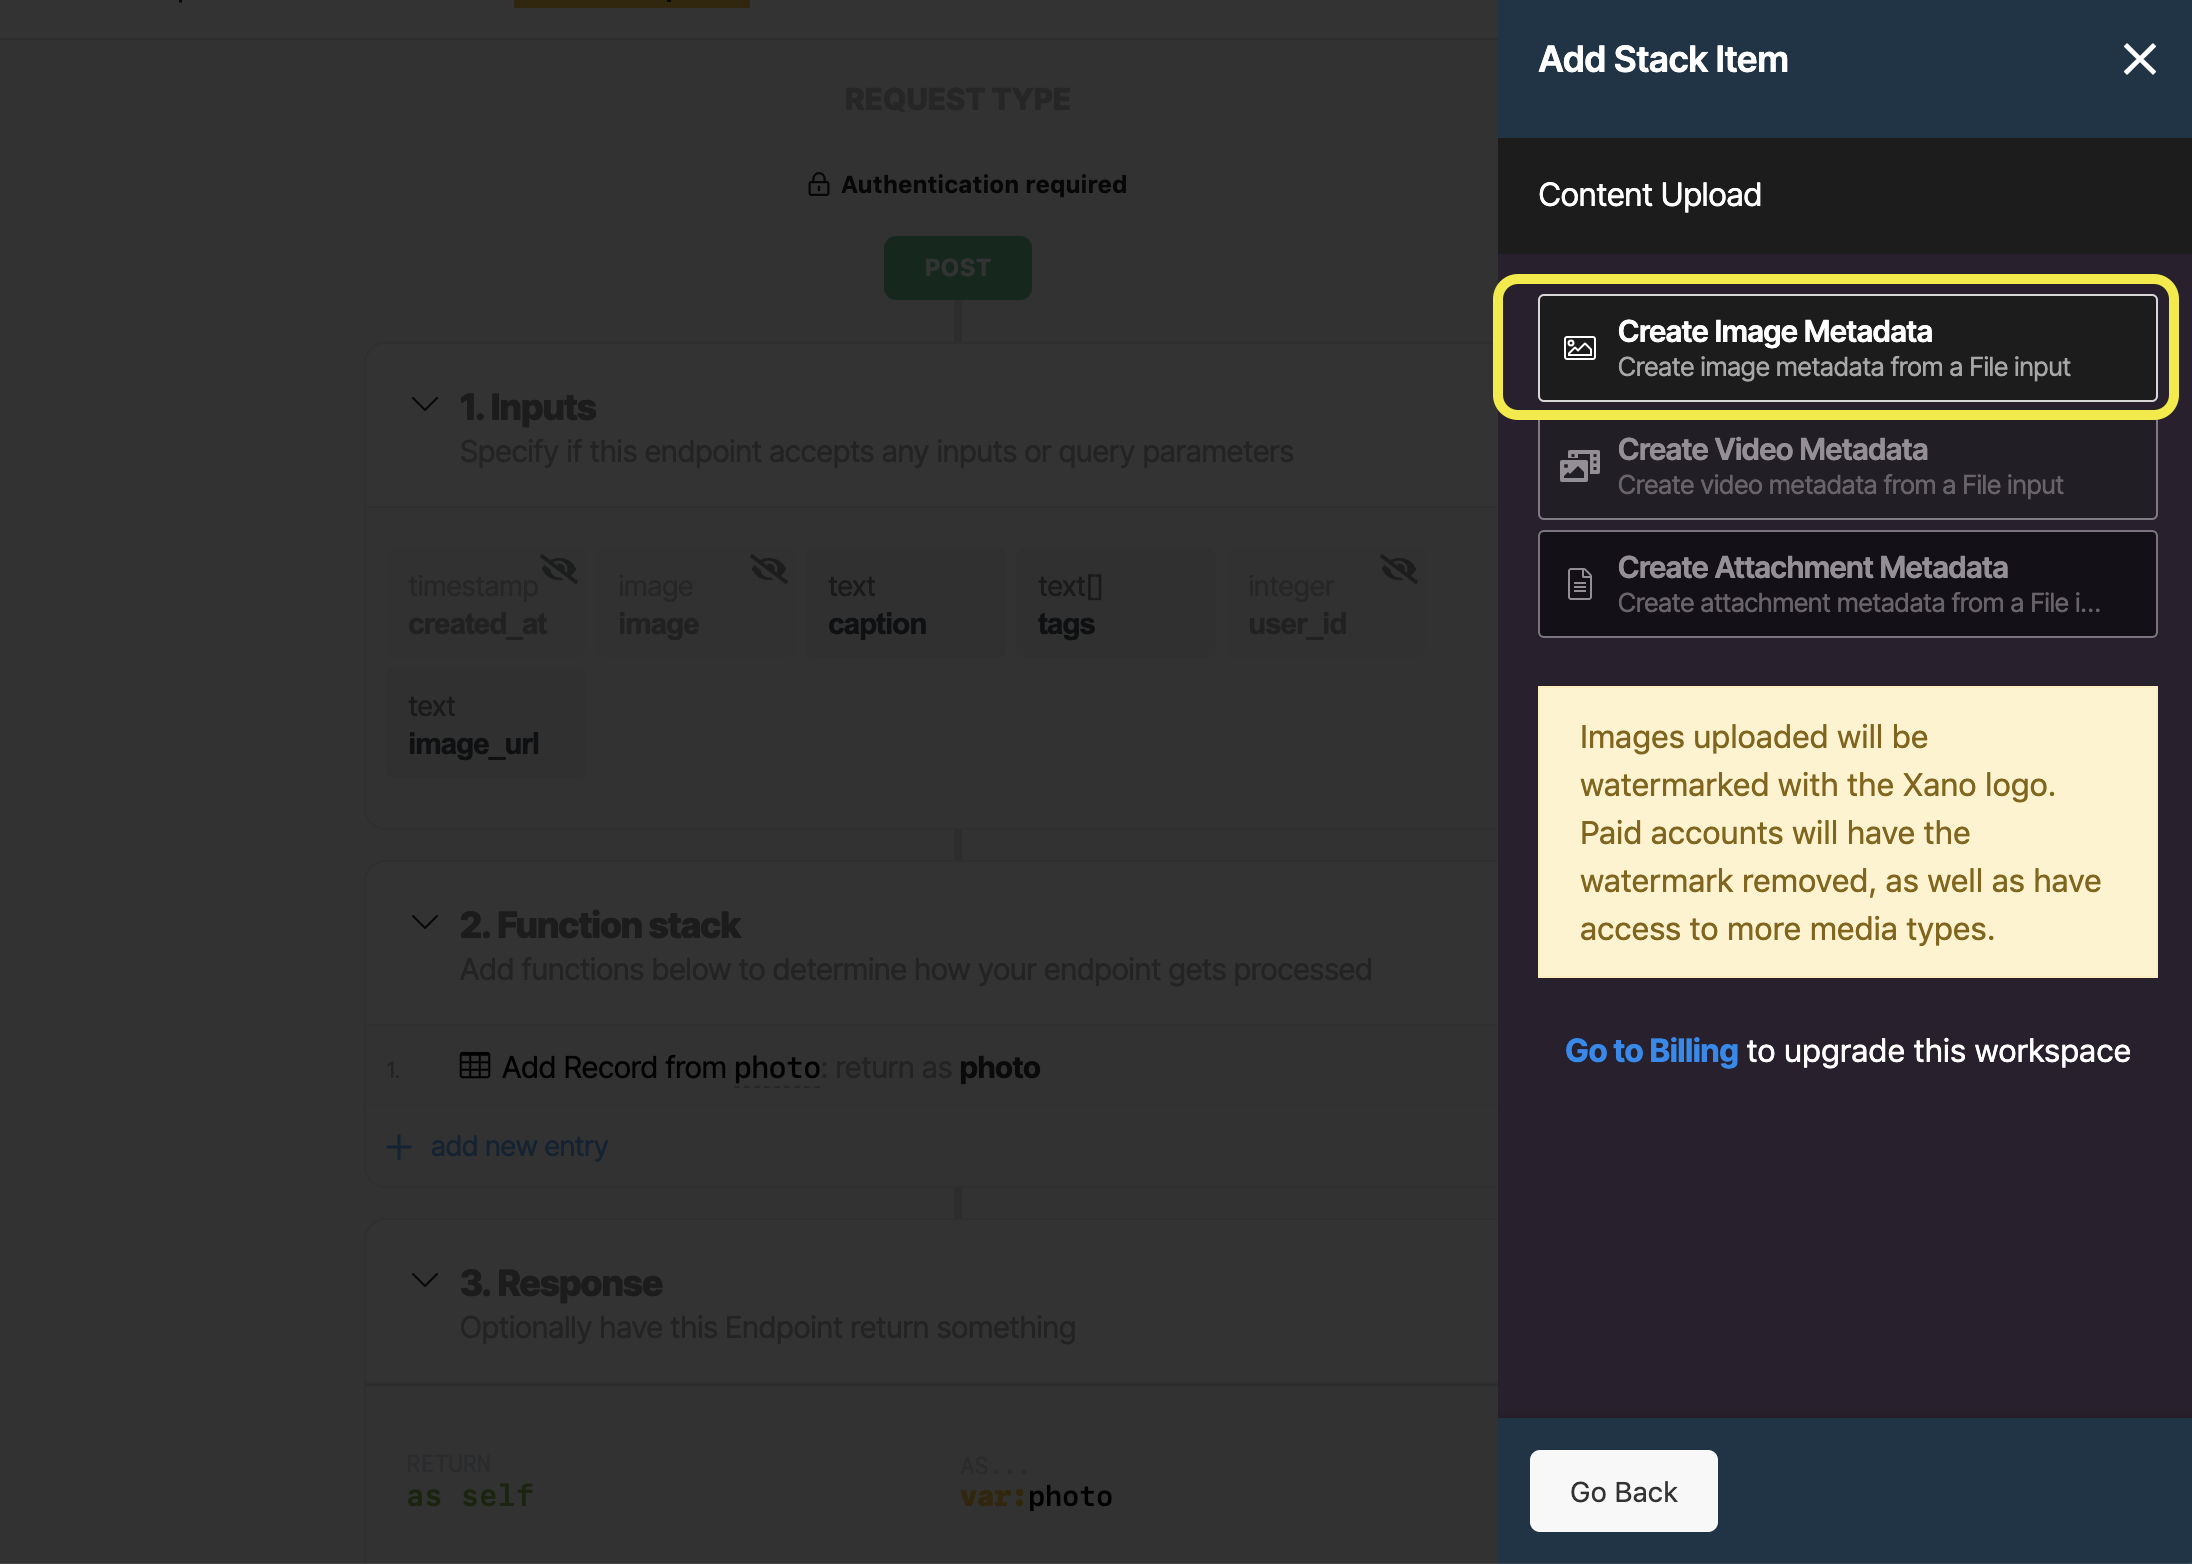
- Click on content upload
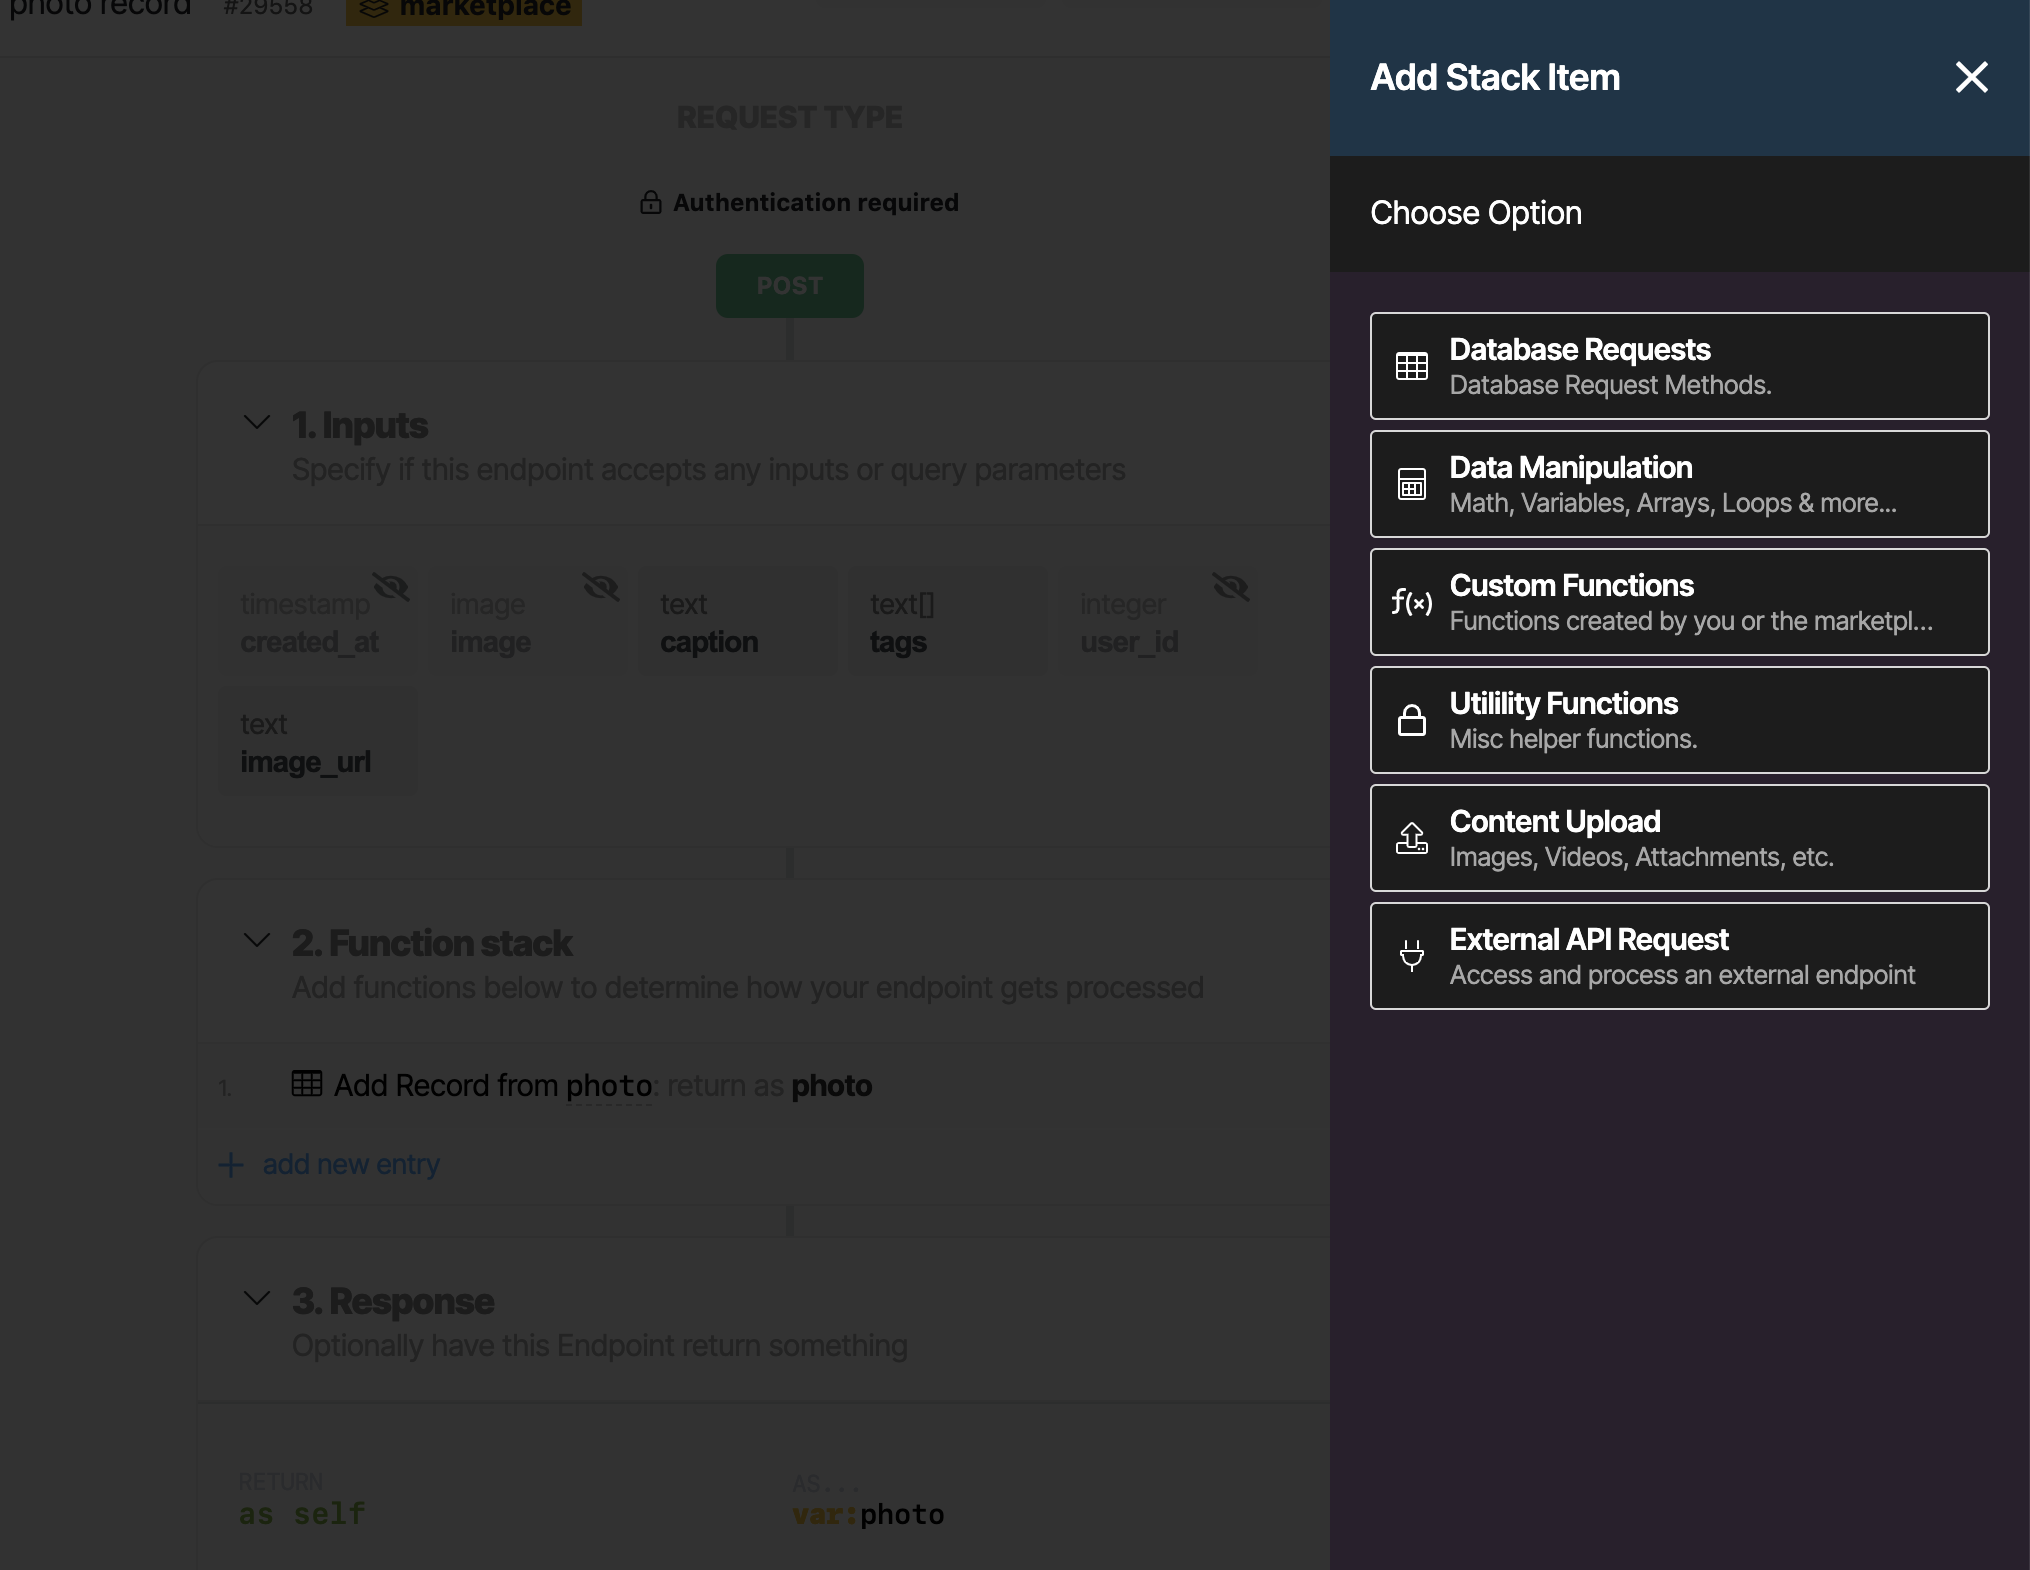
- Click on create image metadata
Highlight the create image from file block and use the 4 arrows icon on the block to reorganize the blocks so this one is above the add recordblock.
In create image from file block change value to ‘image_url’ in the drop down list
Click SAVE
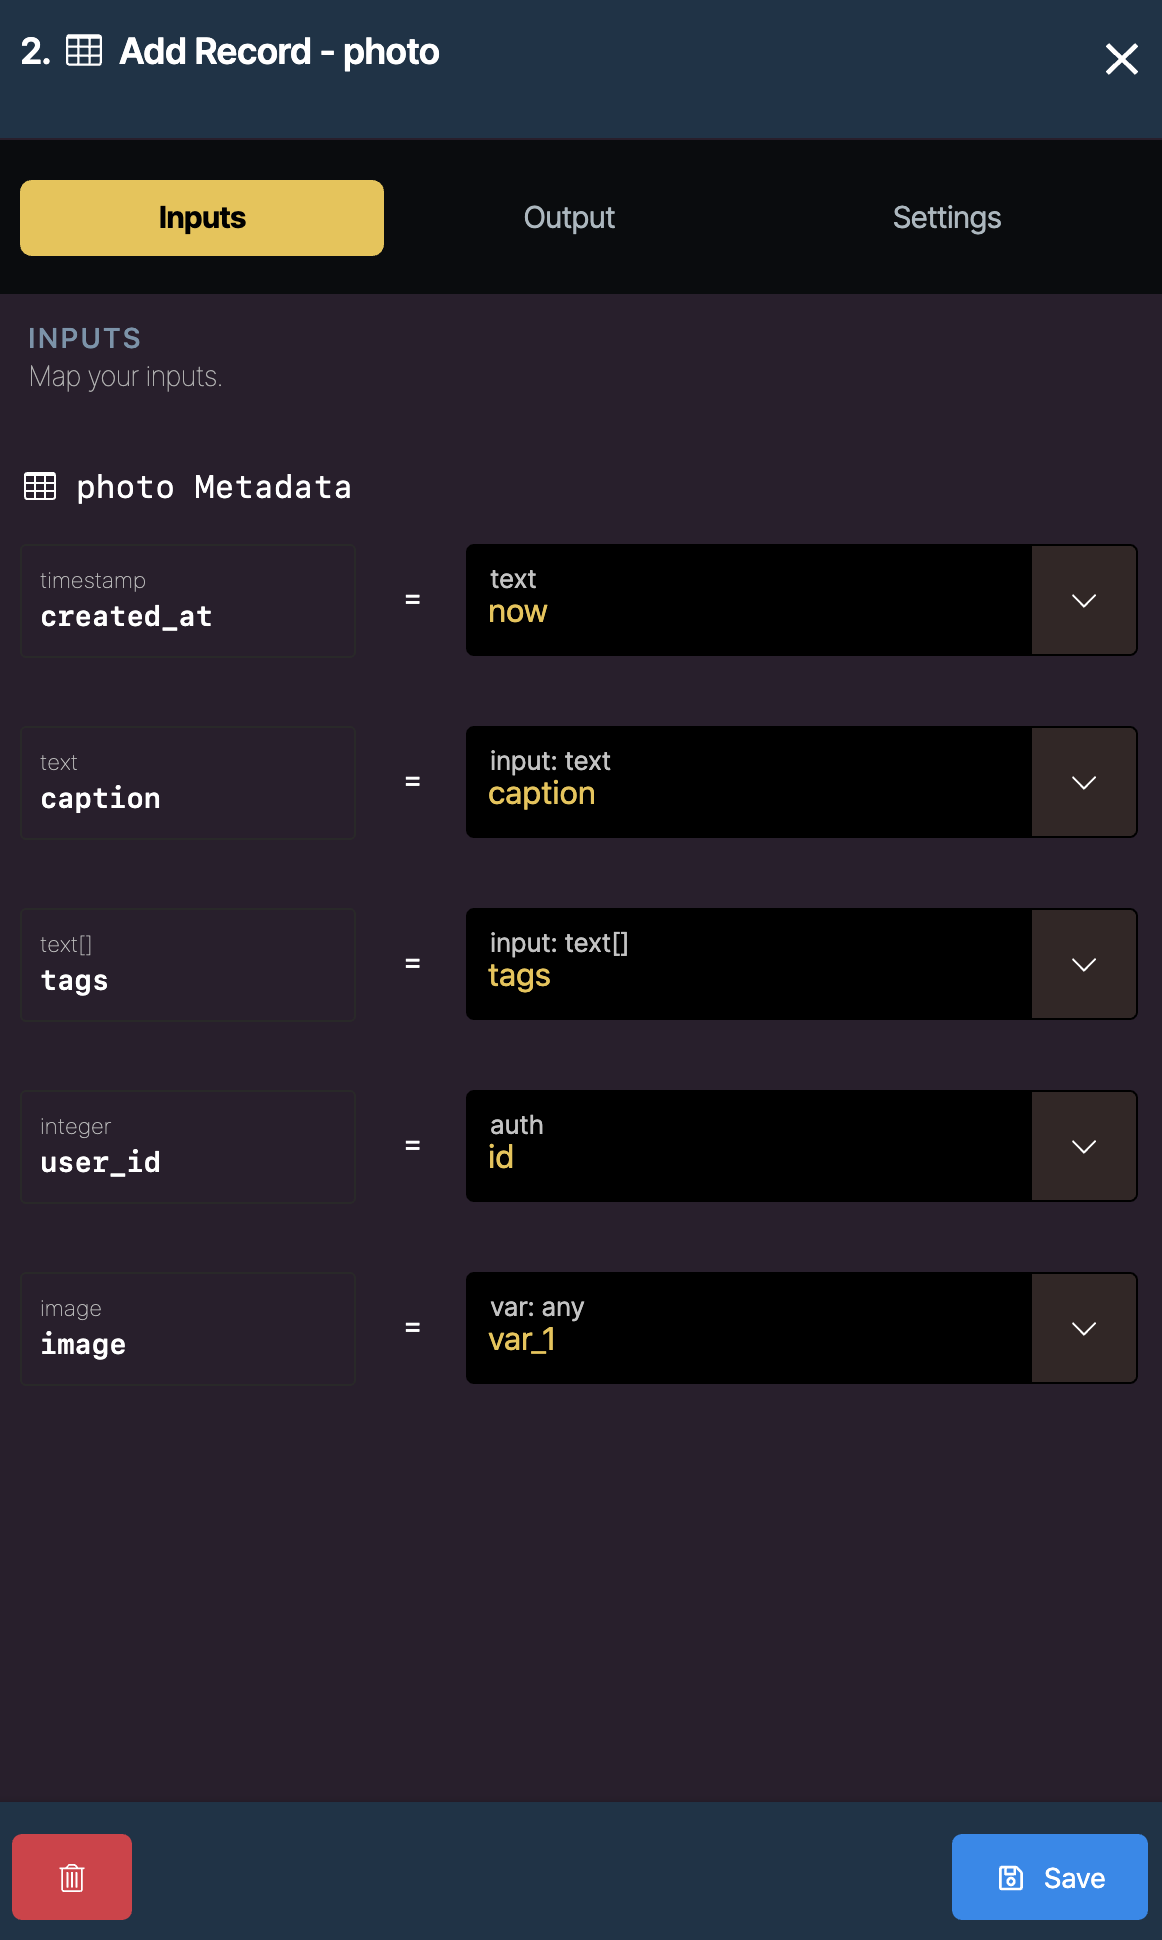
7.Click on Add record from photo block
- Set image to Var_1 from the dropdown the output from the create image block
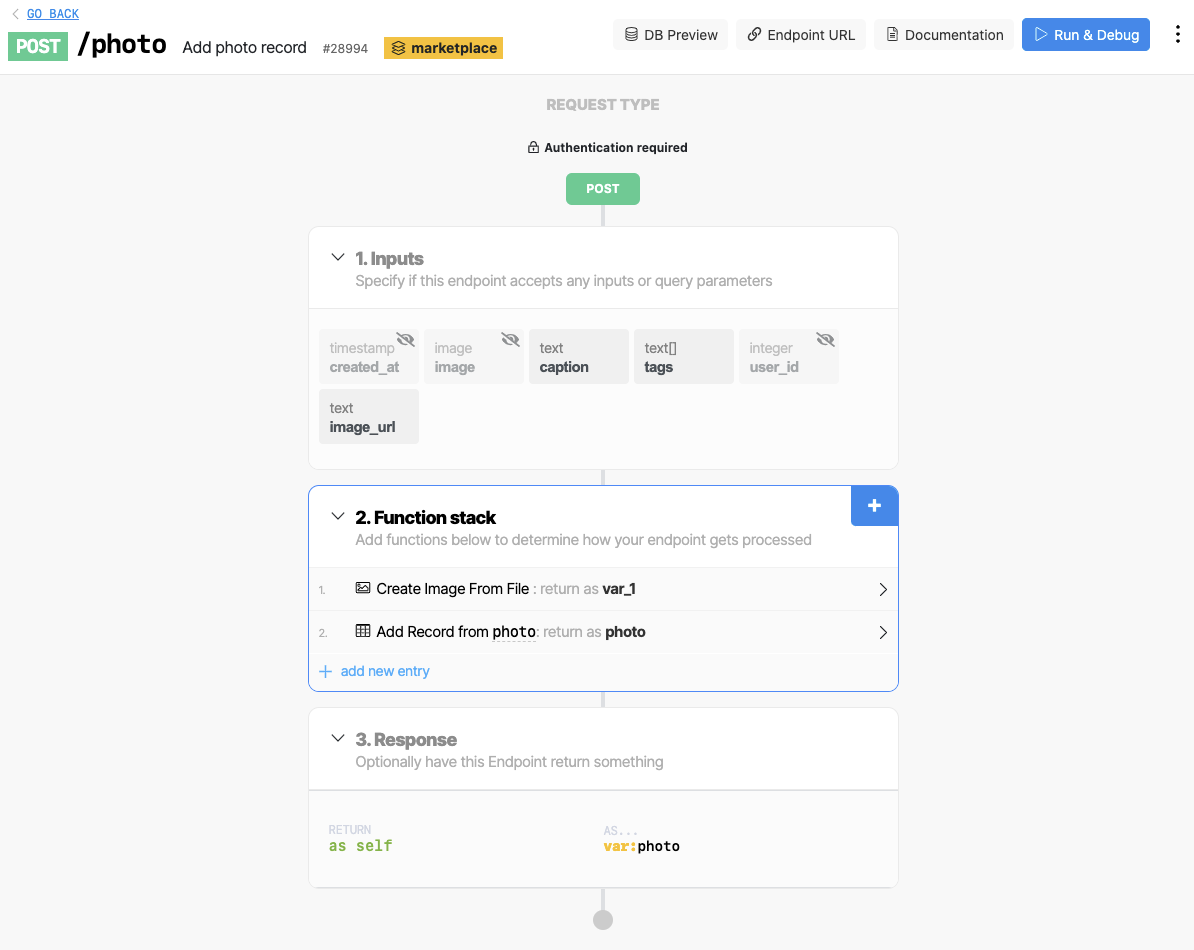
The photo API should now look like this:
Now we need to get an auth-token to help do the setup in Bravo.
8.Click the blue Run & Debug button (above). This will open the debug pane:
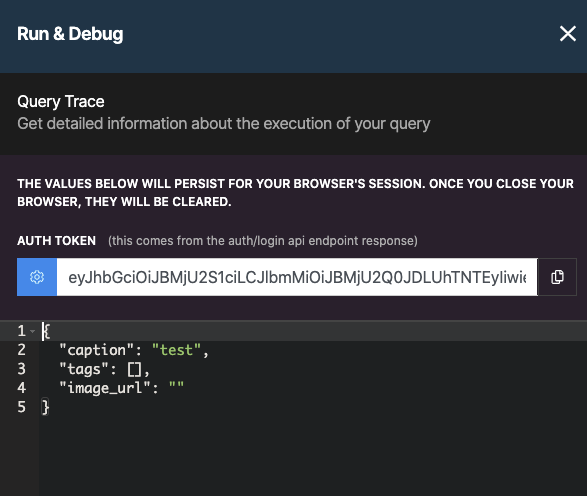
If you click on the cog in blue, it will bring up a list of users, just click on one and Xano will log that user in and give you an auth-token (starting ‘eyJ…’), You need to copy and paste this auth-token somewhere as we will need it in the Bravo API step.
C) Setup the Design in Bravo
Signup for Bravo
Click on Import Figma File
Import this figma file — https://www.figma.com/file/OjR388TcU5ESIhngTEILVP/Foodgram-with-Xano?node-id=0%3A1
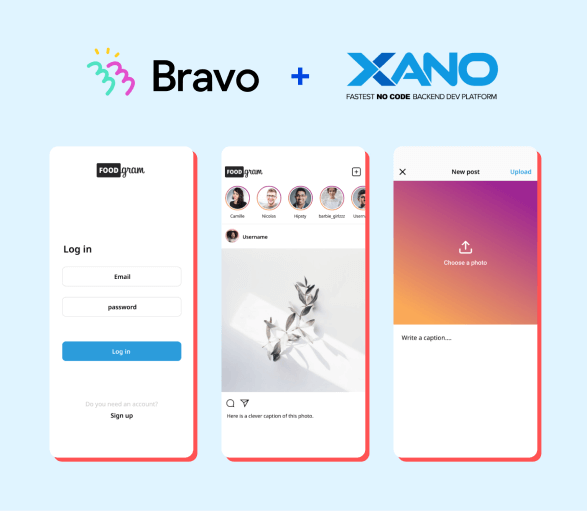
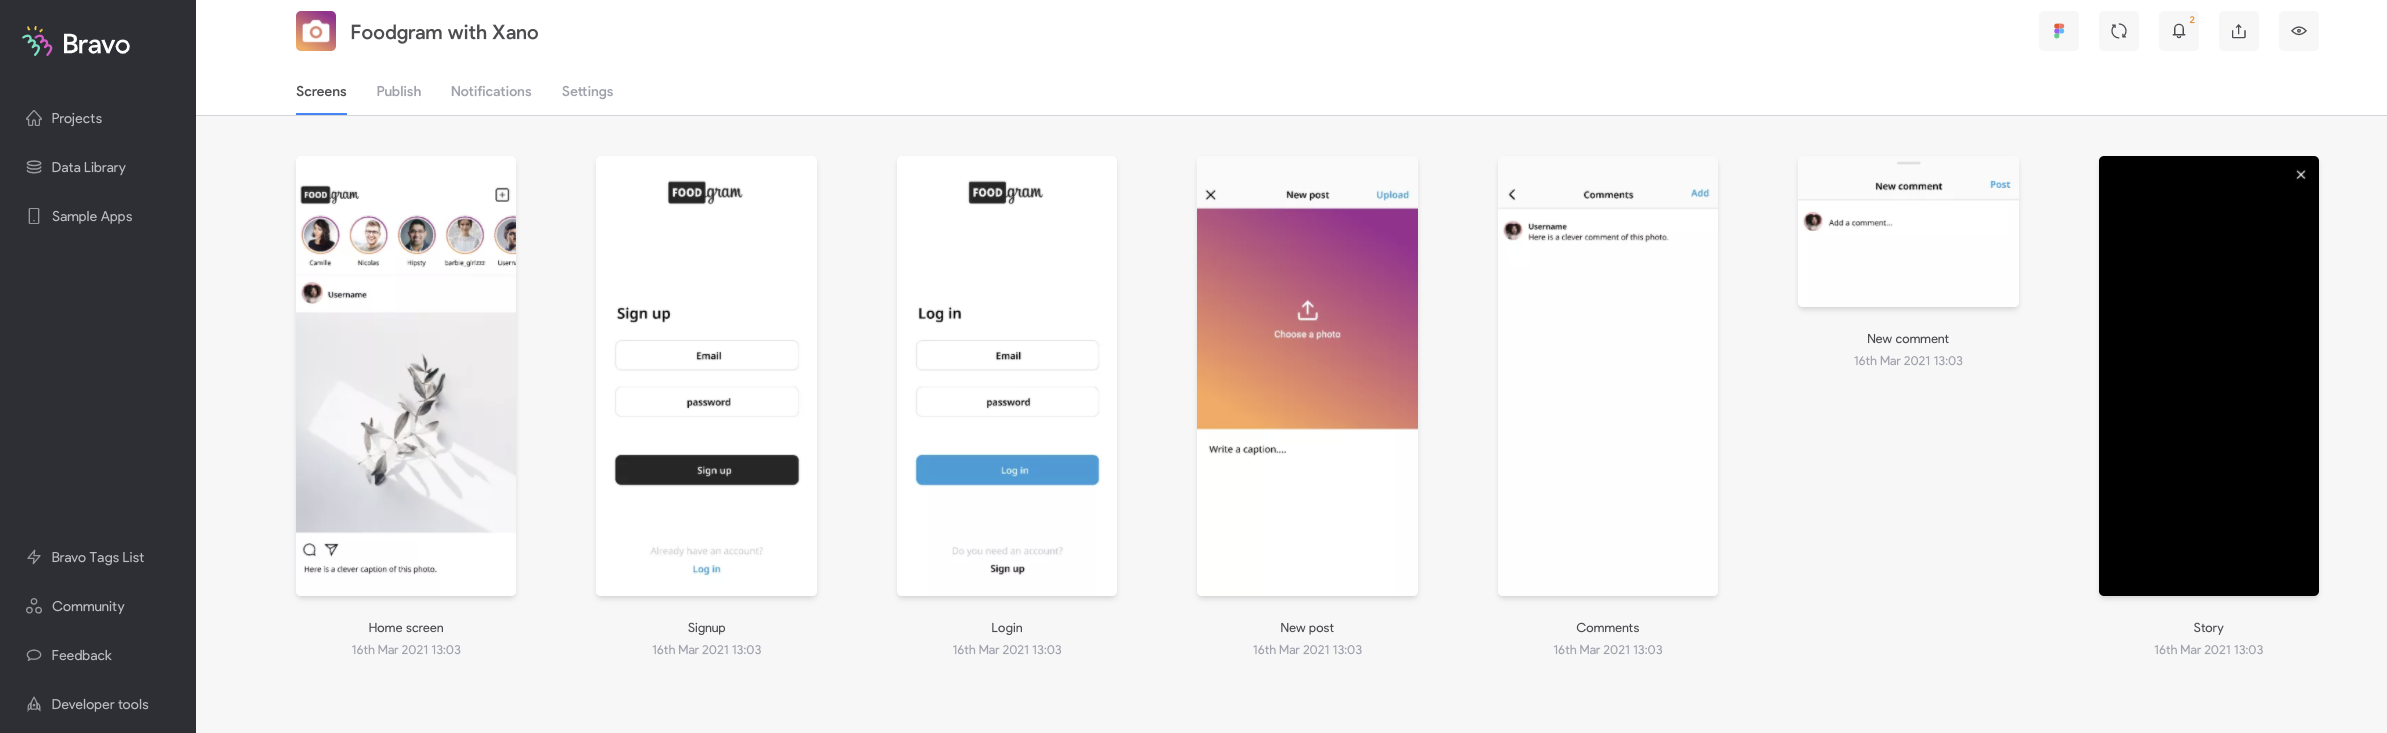
Your design should look like this in Bravo:
D) Setup the APIs in Bravo
We need to add all the api requests that we need from Xano in Bravo:
1.Click on Data Library in Bravo on the left hand side
2.Click on New Collection
3.Click on ‘Custom API’ and Name it Foodgram with Xano
4.Click on the + button next to Requests to add a new request for each of the following 6 requests (NB the
- Signup
Name: Signup Type: POST Request URL:
Once you have setup the Signup Request, hit the blue send button for this request to add that user to Xano so we can setup the other requests.
- Login
Name: Login Type: POST Request URL:
Once you have inputted the above hit the blue send button for this request to get sample data to allow the received data to be setup for this request.
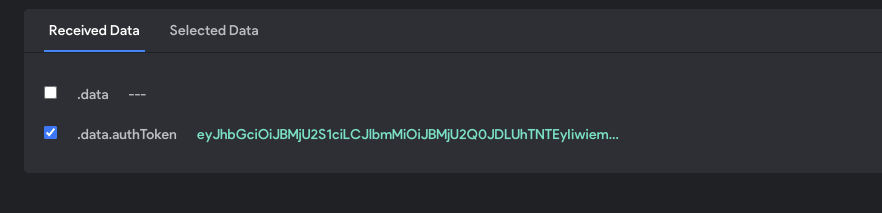
Make sure the .data.authToken field is ticked and then in the Selected Data tab change the field’s name to auth-token. We can reference this name as a variable in other requests to allow the request to pass authentication.
- Add photo
Name: Add photo Type: POST Request URL:
- Get all photos
For this step we will need the auth token form step (B) 8, to enable us to highlight the data we need.
Name: Get all photos Type: GET Request URL:
Once you have inputted the above hit the blue send button for this request to get sample data to allow the received data to be setup for this request.
Make sure the following fields are ticked in the Received data pane , .data.items[], .data.items[].id, .data.items[].caption, .data.items[].image.url, .data.items[].user.handle. Then change the name of the .data.items[].id field to photo_id. (NB this name photo_id needs to be consistent, i.e. not photo-id throughout the queries as its is used by the app to reference the particular photo for comments etc),
- Add comment
Name: Add comment Type: POST Request URL:
Once you have inputted the above hit the blue send button for this request to create a test comment to help with the comment setup.
- Get photo comments
Name: Get photo comments Type: GET Request URL:
Once you have inputted the above hit the blue send button for this request to get sample data to allow the received data to be setup for this request.
Make sure the following fields are ticked in the Received data pane, .data.items[], .data.items[].id, .data.items[].comment , and .data.items[].user.handle .
Now all the APIs are now setup in Bravo and we just have to connect them to the design.
E) Bind the APIs to the design in Bravo
Now that we have the APIs in Bravo the last step is to connect them to the app design. Go into the Foodgram with Xano app so you can see all the screens.
1.Signup
Click on the Signup screen to edit the binding for this screen, choose the Foodgram with Xano collection and then the signup request
In the Select Visual Elements list Click on the username element and connect it to email in the binding panel on the right hand side in the Content Destination section. This will bind the input field to this variable which will be used in the request.
Click on the password element and connect it to thepassword in the binding panel on the right hand side
Change Response Actions — on success to Go to Page — Login.
Change Response Actions — on failure to Show Alert with the text ‘Signup Failed’
2.Login
Click on the Login screen to edit the binding for this screen, choose the Foodgram with Xano collection and then the login request
In the Select Visual Elements list Click on the username element and connect it to email in the binding panel on the right hand side in the Content Destination section. This will bind the input field to this variable which will be used in the request.
Click on the password element and connect it to thepassword in the binding panel on the right hand side
Change Response Actions — on success to Go to Page — Home Screen.
Change Response Actions — on failure to Show Alert with the text ‘Login Failed’
3.Home Screen
Click on the Homescreen to edit the binding for this screen, choose the Foodgram with Xano collection and then the Get all photos request
In the Select Visual Elements list Click on the Post list element and connect it to Items in the binding panel on the right hand side. This will repeat this container element for all the items in the list, so we can bind the content for each item.
Click on username element and connect it to Items user handle in the content binding in the right hand panel.
Click on **image element and connect it to Items image urlin the content binding.
Click on **caption element and connect it to Items captionin the content binding.
4.New Post screen
Click on the New Post screen to edit the binding for this screen, choose the Foodgram with Xano collection and then the Add Photo request
In the Select Visual Elements list Click on the **image upload element and connect it to image_url field in the binding panel on the right hand side in the Content Destination section. This will bind the input field to this variable which will be used in the request.
Click on the **caption element and connect it to thecaption in the binding panel on the right hand side
Change Response Actions — on success to Go to Page — Home screen.
Change Response Actions — on failure to Show Alert with the text ‘Upload Failed’
5.Comments screen
Click on the Comments screen to edit the binding for this screen, choose the Foodgram with Xano collection and then the Get photo comments request
In the Select Visual Elements list Click on the Comment list element and connect it to Items in the binding panel on the right hand side. This will repeat this container element for all the items in the list, so we can bind the content for each item.
Click on username element and connect it to Items user handle in the content binding in the right hand panel.
Click on **caption element and connect it to Items commentin the content binding.
6.Click on the New Comment screen to edit the binding for this screen, choose the Foodgram with Xano collection and then the Add Comment request
In the Select Visual Elements list Click on the **comment element and connect it to the comment field in the binding panel on the right hand side in the Content Destination section. This will bind the input field to this variable which will be used in the request.
Change Response Actions — on success to Go to Page — Comments.
Change Response Actions — on failure to Show Alert with the text ‘Comment Failed’
Testing
You should now be able to test your app in Bravo Vision, signup and then login and add images and comment on them.
As you add content you can check it working by looking at the tables in Xano, or make request from the Run and debug panels for each request.
Have fun, and let us know if you get stuck.
Bravo Team